Quick start: app for your USB pushbutton or pushbox
Using our programming app makes the configuration of your USB pushbutton or pushbox a lot easier. Follow the short and simple instructions to download and install the app, to connect your USB pushbutton or pushbox with the app and to configure the key combination for “Windows logout” (Windows + L).
App assistance for the USB pushbutton or pushbox – programming success in 10 steps
- Download and install the “Pushbutton Pushbox configuration app”. It is available both on the product information page and on the delivered mini CD.
- If you’re not sure if you installed the hardware driver correctly, check the installation success via control panel -> device manager. If you see an “Arduino Leonardo” device in the section “Ports” (COM & LPT)’ without exclamation mark, the driver installation is completed. Otherwise, you must download and install the Arduino IDE.
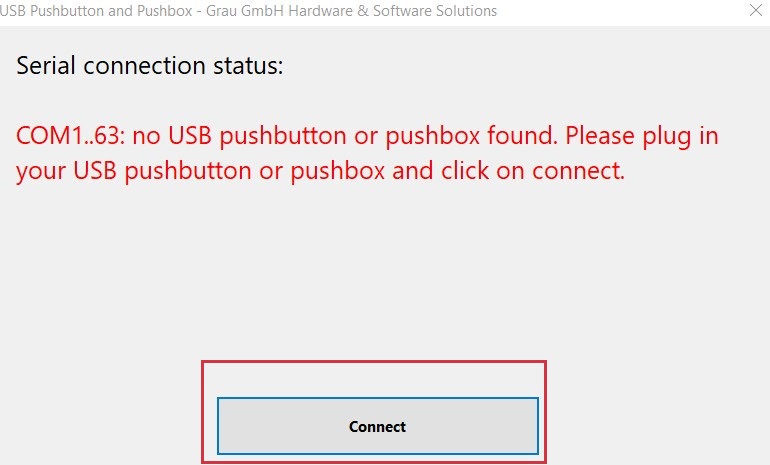
- Open the app on your computer, then plug in and connect your USB pushbutton or pushbox.
- If necessary, clear any command lists in the main dialogue before you start programming. Select command list 1 and command row idx=0.
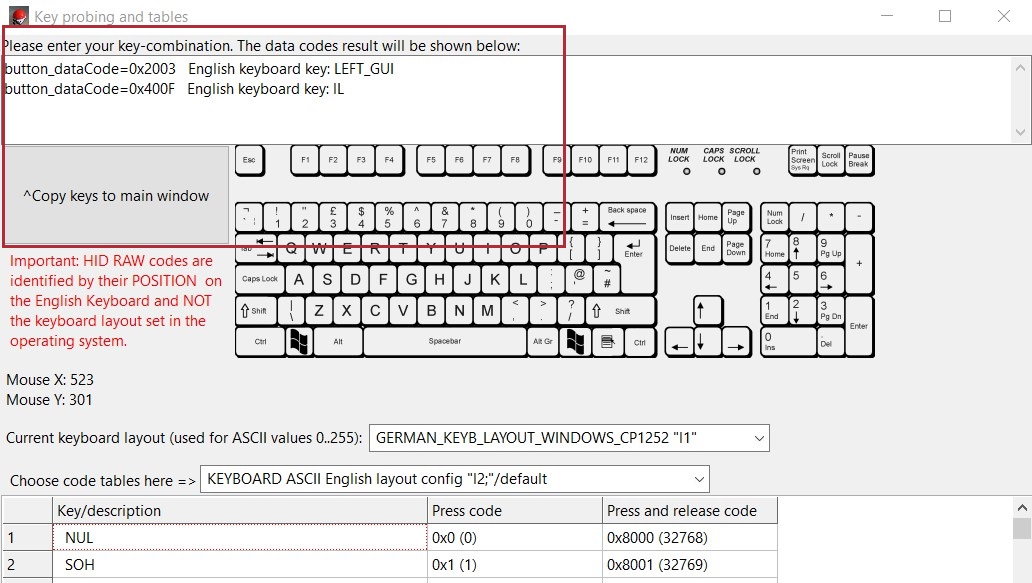
- Select Key Probing and Tables and switch to the newly opened dialogue.
Programming “Windows + L” on your USB pushbutton or pushbox
- Enter the key combination “Windows + L” into the input field at the top. Select ^Copy keys to main window.
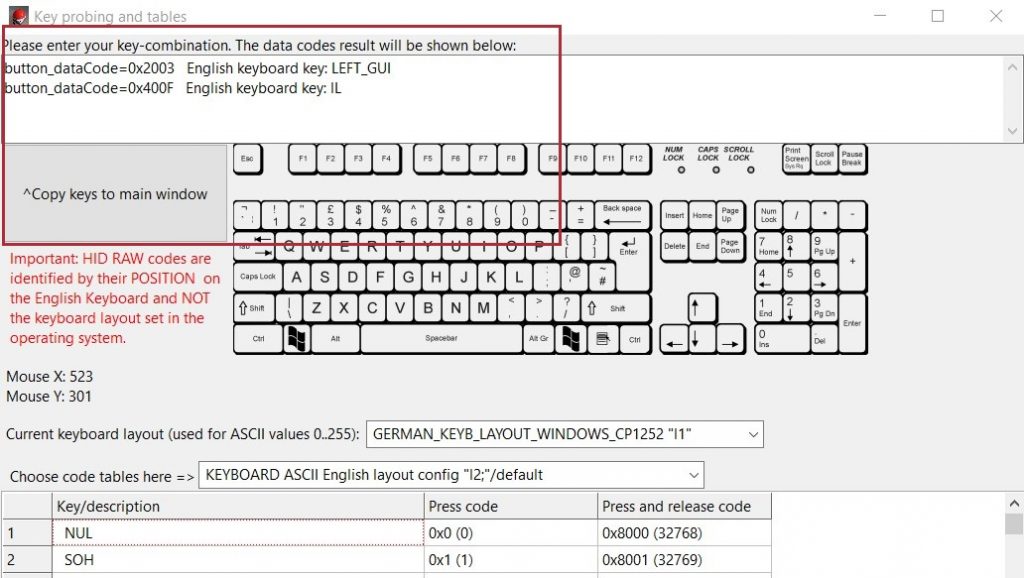
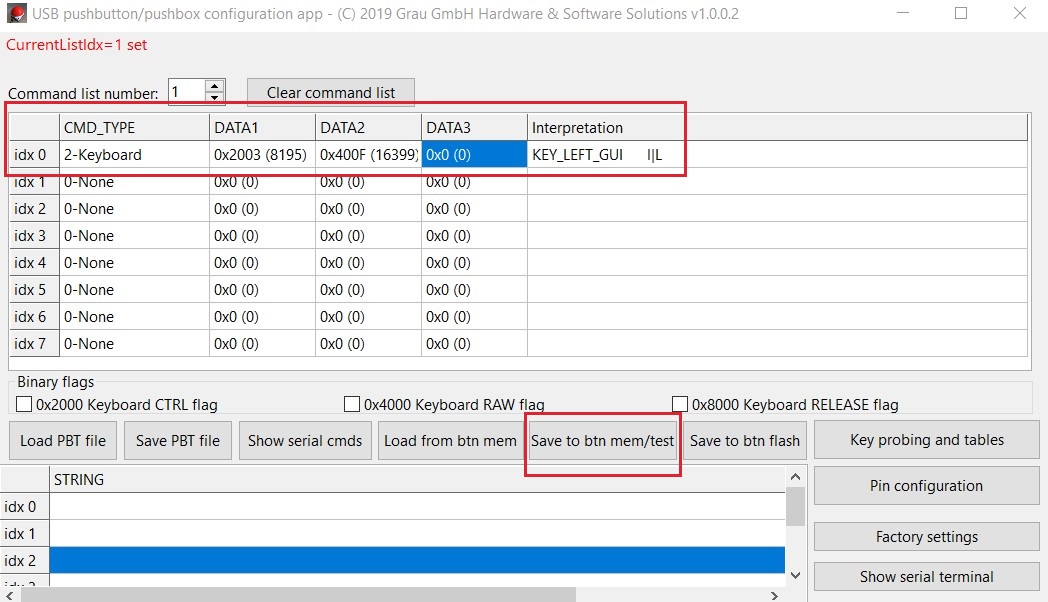
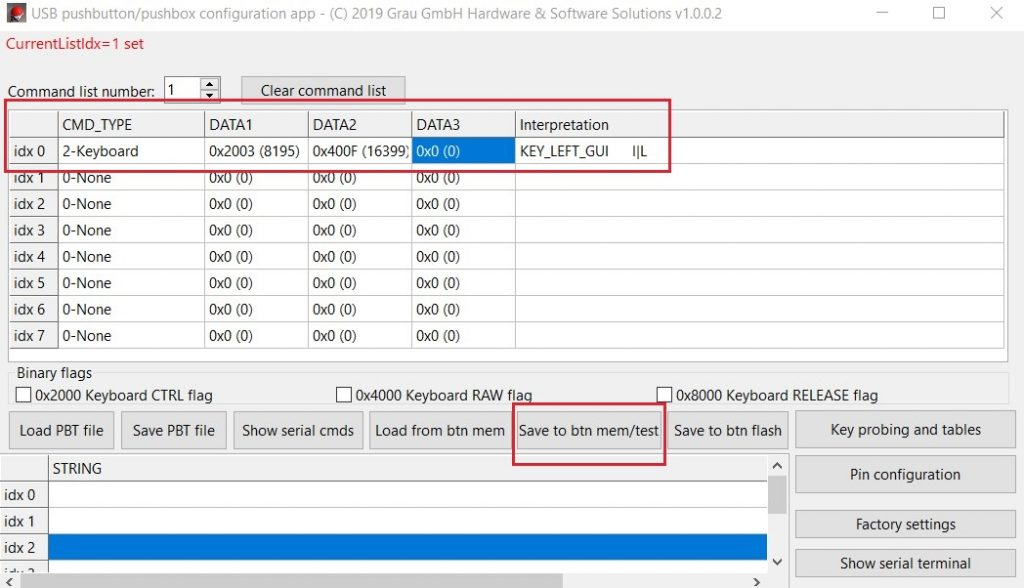
- Switch to the main window and check the column Interpretation for your results.The interpretation must match with your entries.
- If the app’s interpretation is correct, save the configuration for testing via Save to btn mem/test.
- Push the button(s) included in your USB pushbutton or pushbox. If your programming was correct, Windows automatically logs you out now.
- Log in again and save your configuration in the pushbutton’s flash memory via Save to btn mem/flash.